Add, Edit, or Delete a Customer (App)
To learn how to add, edit, or delete a customer account in the Skimmer app, see the video below. Or, if you prefer, scroll past the video to view our step-by-step text instructions.

Step-by-step instructions . . .
- 1
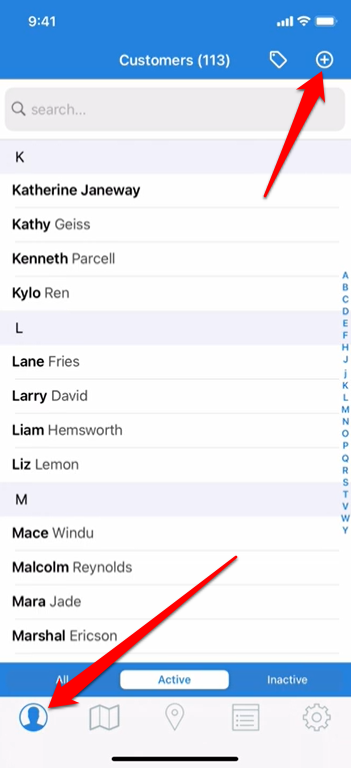
- Skimmer makes it easy to manage your customers, both on the web and the app. We’ll show you how to add, edit, or delete a customer account on the app. Start by going to the Customers tab on the far left. Only admins have access to this tab so, techs will not be able to see it. To create a new customer account, start by tapping the Plus sign in the top right corner, and you’ll be taken to the Add Customer screen. Right away, you’ll see there’s lots of information you can include from the beginning. Having said that, if you need to create an account quickly – for instance, if a potential customer wants a service estimate very quickly – all you need to create and save a customer is their name and their billing and location address, and then you can go back and fill in the other information later if you want.
- 2
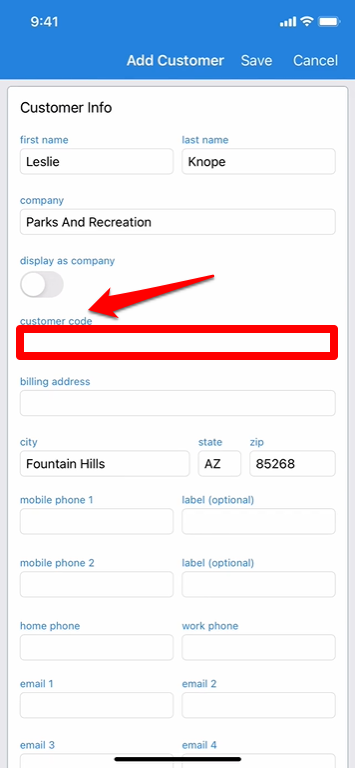
- Start by adding a first and last name. You can also add a company name, and if you like, you can toggle the option to display this account by the company name instead of the first and last name. Customer Code is a label box that allows you to add a unique identifier to the customer. Whatever you put here will appear next to their name on the Customers list and on the tech’s route. Some use this to indicate service level such as whether a customer receives a Silver, Gold, or Platinum service package, but you can get creative and use it however you like.
- 3
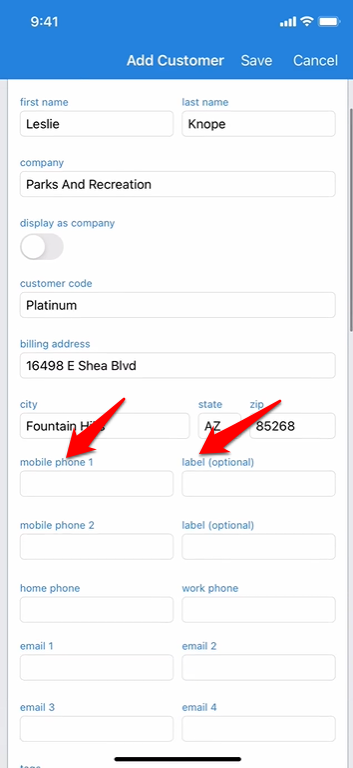
- Enter the billing address. Following that, you have four boxes available for phone numbers, two mobile numbers, which you can also label for who they belong to, a home phone, and a work phone. You can also include up to four email addresses for each customer and any that you add here will be included in receiving the service emails.
- 4
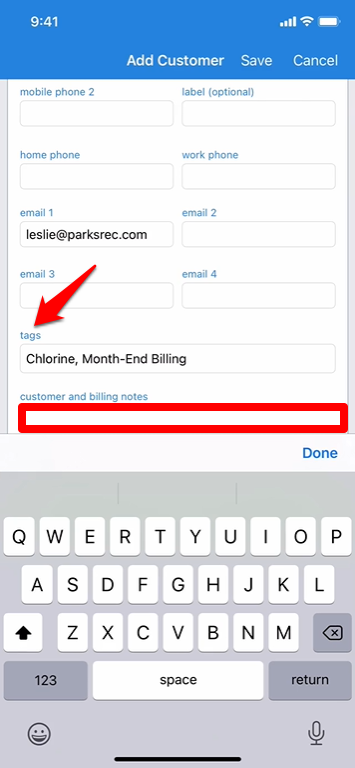
- Next, you can assign any tags that apply to this customer. These tags are created and managed by you, and we show you how to do that in another video. Customer and Billing Notes is an open text box. Here you can record any information that you’d like to keep in the system, so you and your admins can view it anytime. This box CANNOT be seen by techs.
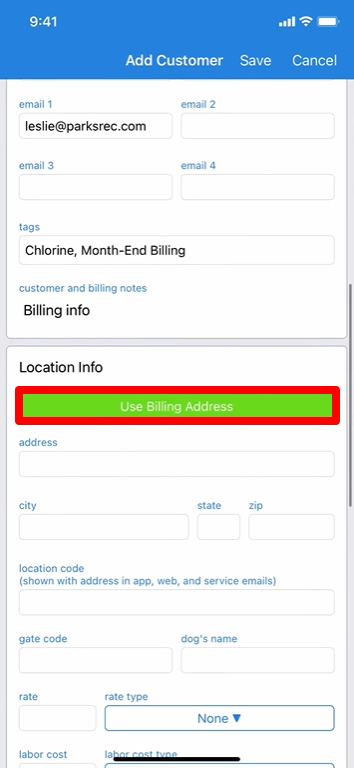
- 5
- If your customer’s service location is the same as their billing address, you'll tap the Use Billing Address button. But if it’s different for your customer, for instance, if they own several properties that all get billed to the same place, but the actual service addresses are different, you can enter that here.
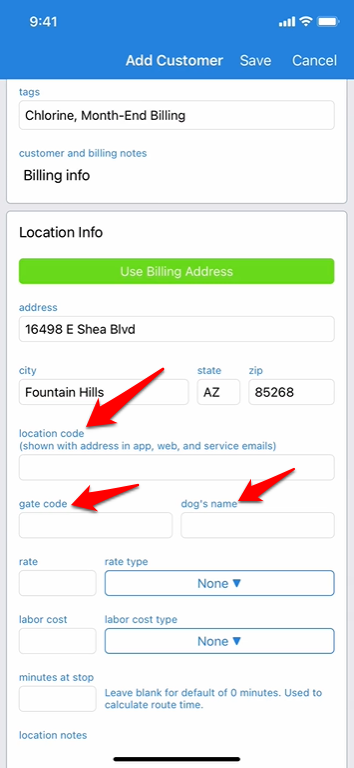
- 6
- Location Code functions just like the Customer Code, except you’re attaching the label to the service address instead of the customer. So, again, if the customer has multiple locations, it’s a great way to differentiate them. Gate Code and Dog’s Name can also be very helpful to your techs in the field.
- 7
-
Rate is what you’re charging the customer, and Rate Type tells Skimmer how you charge them. You’ll see there’s several options under Rate Type. If you choose Per Stop, Skimmer will apply the rate to each completed service. So if you choose this and service the customer 4 times in the billing period, Skimmer will calculate the rate times 4. If you choose Per Month, Skimmer will apply the rate one time no matter how often you service them during the billing period, whether its 1 time or 10 times. These options allow you to bill each time you service, or just charge a flat monthly rate.
What about the chemical options? If you choose Plus Chemicals, Skimmer will note an extra charge for every chemical dosage that you enter into the system. (Note that we show you how to set up chemical readings and dosages, including your cost and price per unit, in other videos.) If you choose With Chemicals, it means that you want to include at least some chemicals in the Rate that you’re already charging the customer. (And again, other videos show you how to specify which chemicals this applies to). So, to sum up, if we set the rate to 125.00 and the rate type to Per Stop Plus Chemicals, it means we want to charge the customer 125.00 for each service visit, and we’re also going to add a charge for the chemicals we used during each service.
Labor Cost indicates what you’re paying the tech to service this pool, if you’re paying per job. And under Labor Cost Type, you can make that a per-stop or per-month payment.

-

- 8
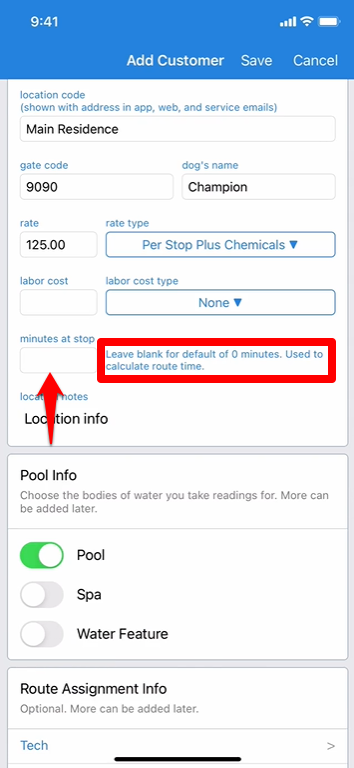
- What is Minutes at Stop? In order to estimate how long a particular route will take, Skimmer applies a default duration to each route stop until the tech performs the work, at which time their actual duration will overwrite this default. If you know a particular customer always takes longer than the system default estimate, you can change it here.
- 9
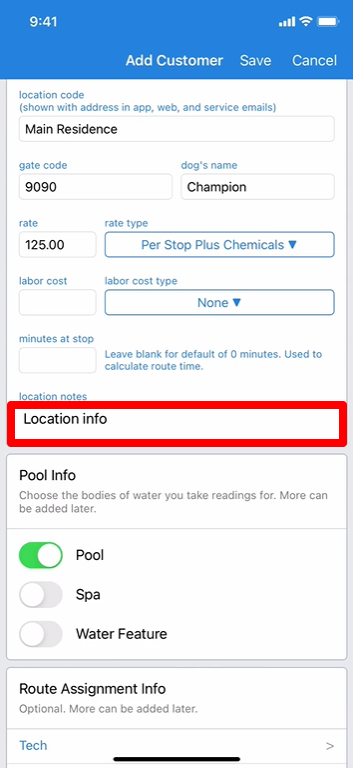
- The Location Notes box can be used to record any extra information you want to keep in the system about this location. The techs will be able to see this box, so if you want them to know anything extra about where they’re going, you can enter it here.
- 10
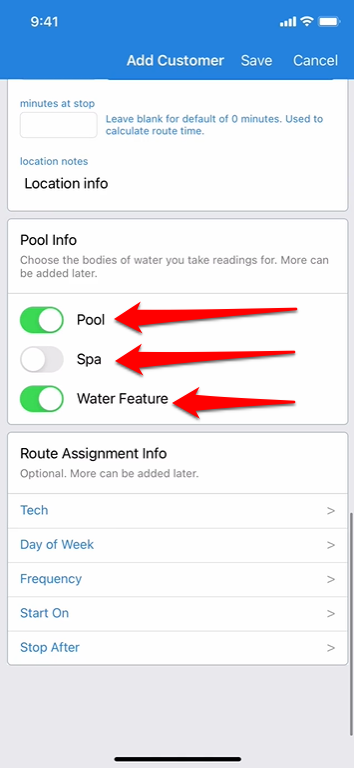
- Next, we’ll indicate which bodies of water the customer has. Once the account is created, you’re able to go back and add as many bodies of water as you like, with custom names if you prefer.
- 11
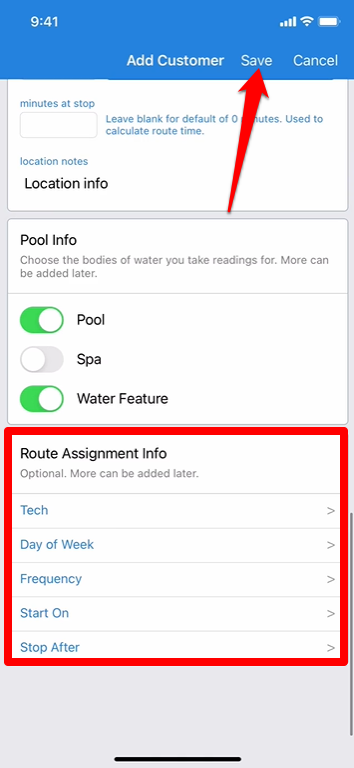
- Lastly, if you’re ready to add a route assignment for this customer, which means getting them on the regular service schedule, you can do so here, and then they’ll be on the service schedule as soon as you create them. Once they’re created, you’ll be able to add more route assignments, which is useful for customers that are serviced multiple times per week. Don't forget to tap Save.
- 12
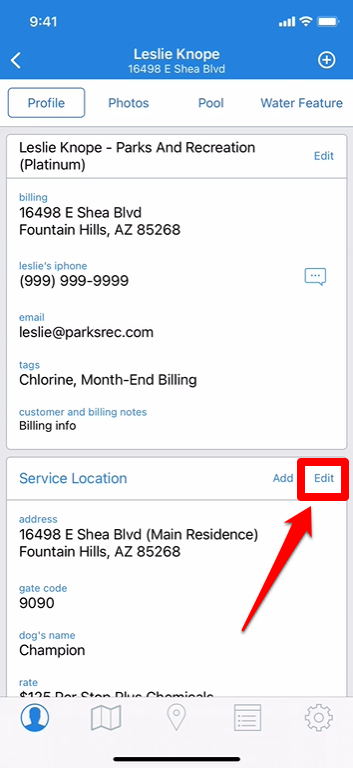
- What if you’ve created a customer, but you need to update some of their information? Just find them in the Customers list and tap their name. Then you’ll be taken to their profile. In other videos, we show you how to add equipment photos and other pool information. So, what if the customer changed their gate code and you need to record that? Under Service Location, tap Edit, and you’ll see a box showing the location info you previously entered. Changing the gate code is as simple as typing in the new number and then tapping Save. The next time your tech’s device syncs, they’ll get this new information.
- 13
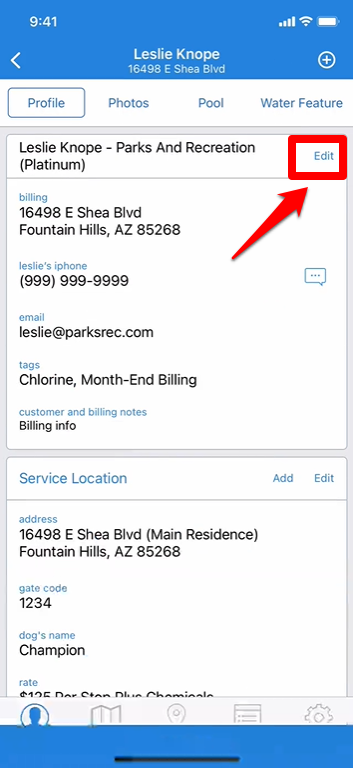
- What if you no longer want this customer in Skimmer? You’re able to fully delete their account. Please note that deleting a customer account is permanent, CANNOT be undone, and will also erase all service history associated with their account. Once gone, it cannot be retrieved, so make absolutely sure you want to do this. In the customer’s account, tap the Edit button next to their name. On the Edit screen, scroll to the bottom and you’ll actually see two options there. If you’re not actively servicing a customer and you don’t want them in your main list, but you also don’t want to delete all their data, you can just make them Inactive. However, if you truly want the information erased, tap Delete. A Delete box will ask you to confirm by tapping Delete again. Once you’ve confirmed, Skimmer will permanently erase that customer’s account.